Wow, I have been neglecting my blog! I am hoping to have more time for my crafts now! I miss them and all my blogger friends! :) Robyn at My Pink Stamper has given some challenges to make this weekend even more fun. Challenge 4 is to create a Mother's Day themed project...
Today I hosted a Mother's Day brunch for my mother and my Aunt. We are very close with my Aunt and Uncle and it was important to me to recognize that special relationship.
I created napkin rings with Coredinations Whitewash collection. (I only had one page of each color and nobody local had any more so I had to make 2 colors.) I also created place cards using tinfoil and my new Big Kick!!!
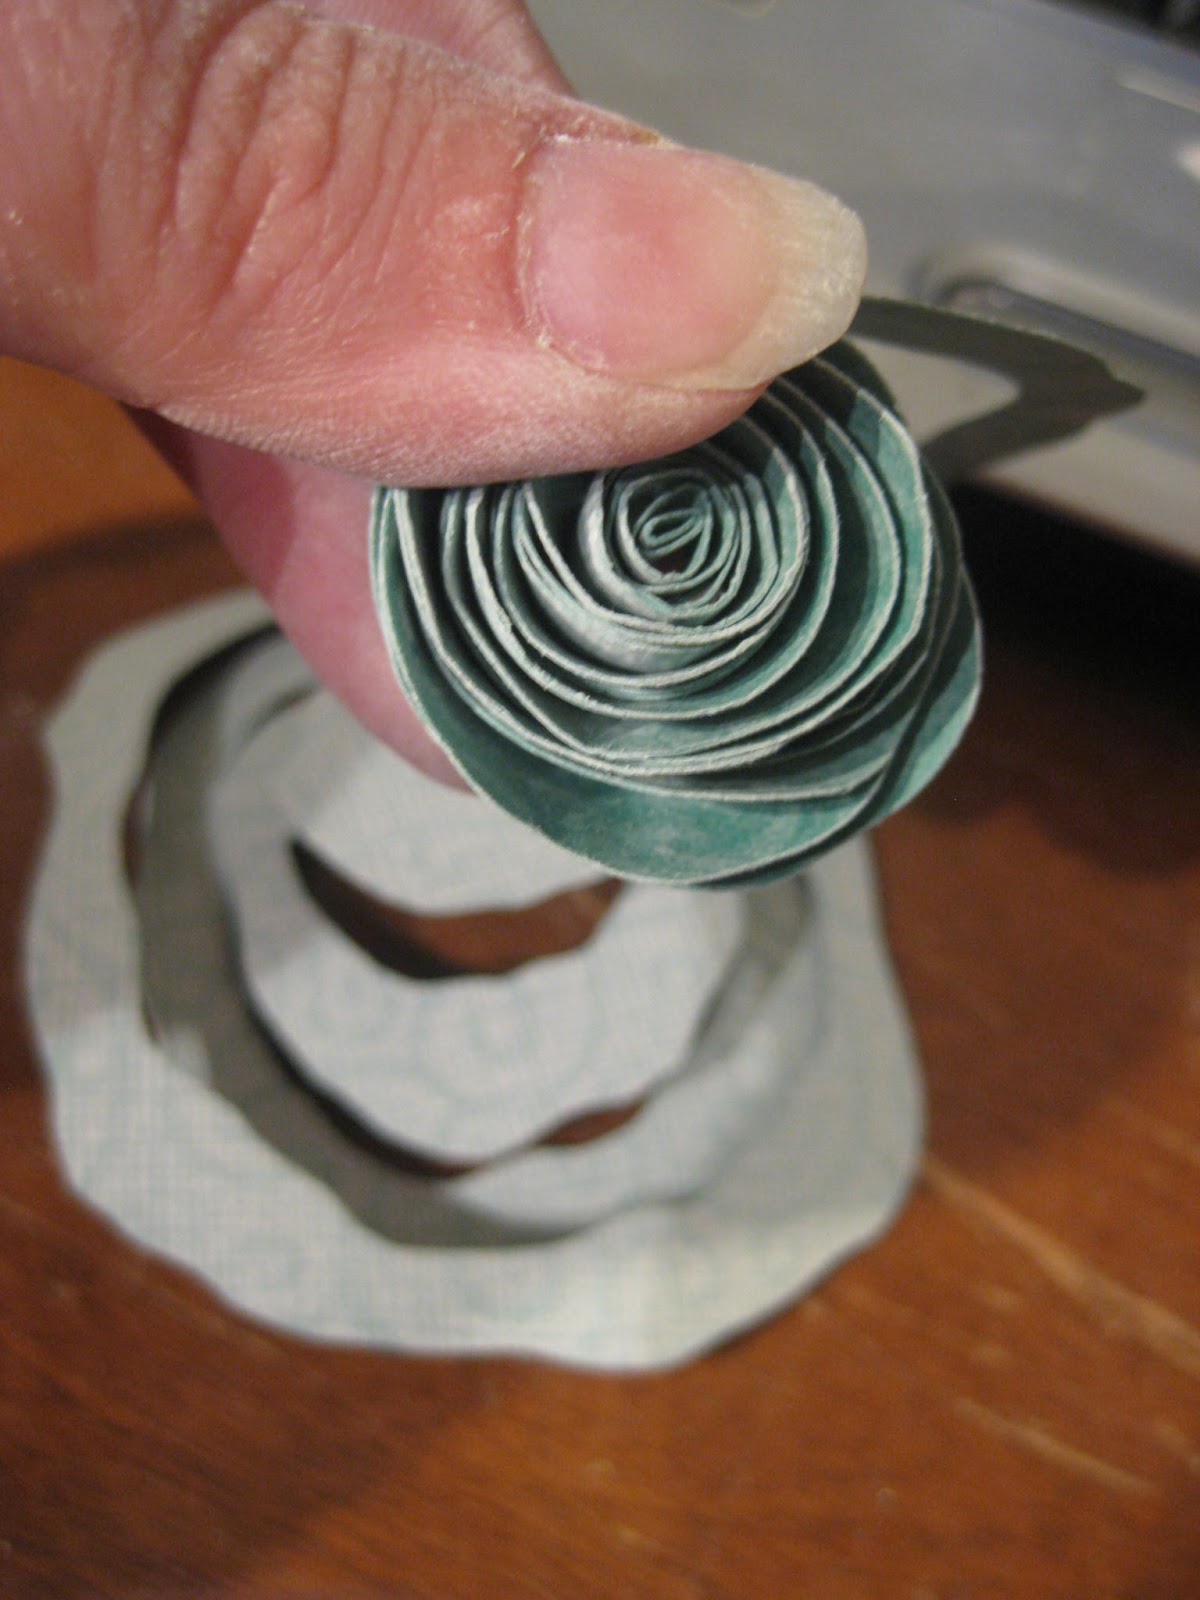
Under the photos I put a brief tutorial on how I made the paper flower. I am beginning to think everyone else in the world knows how to do them and I was alone in not know though!
How to create paper flowers.
1. Cut a 5" x 5" square of cardstock.
2. Cut that into a circle, mine wasn't a circle at all I am cutting challenged but my shape worked :)
3. Cut around the circle in a spiral. I made my edges raggedy and rounded to give the flower a more flowery look in the end.
4. Start rolling the flower. I rolled mine as tight as I could. I let it loosen up a bit after I had it all wrapped.
5. At the end of the spiral I had left a small circle in the center. I glued the flower to that using a ton of tacky glue. I held it in place for a bit and it stayed nicely.
I was actually pretty excited by how well these held up and they are going to work again in the future because they were quite durable!!! I used a glue dot and attached them to ribbon to make napkin rings.
For some other challenges I am linking up to:
For Fun Challenges and Patti Lynn Creations want to see flowers!
Tuesday Throwdown, More Than Favors and Paper Cutz Challenge are to see Mother's Day projects!
Showing posts with label home decor. Show all posts
Sunday, May 8, 2011
NSD Challenge 4- Mother's Day Brunch and Paper Flower Tutorial
Friday, April 22, 2011
I LOVE spray paint!
***Blog hop winner will be posted tomorrow***
So yesterday I got home from vacation and promptly decided to paint my dining room. I was going to ease hubby into it and hope to have him convinced that it would be a good summer project. I picked up a bunch of swatches and wouldn't you know as I walked out of the paint aisle they had a can of "oops" paint for 5 bucks in almost exactly the same color as my swatches!!! So, I decided to paint last night. I had a light fixture in my dining room that I HATED! So a couple cans of spray paint and I transformed it, well at least in my opinion. What do you think?!
| In case you missed the fixture. |
| Here is the etching on my glass globes. |
| New color. |
| You almost can't see the grapes etched in. How fab is the new fixture color?! |
Monday, February 28, 2011
Vinyl on Wall!
| Before |
| After |
ANOTHER snow day! The last day of February and we are getting dumped on. At least I get a day off from work with my kids. :)
In my craft space (I can't really call it a room but it is a space I have taken over for my "stuff") the walls are just plain green. Nothing really matches in there which drives my husband nutso! I love it because it actually means he won't bug me when I am in there. ;) I used Lyrical Letters, black vinyl, and my favorite- transfer tape! For the MOST part this was fun. The vinyl and I had a few discussions about staying put when I told it to. We also disagreed on how to make it all look straight. In the end I won and the vinyl is stuck where I wanted it.
So today I thought I would put a quote on the wall. My mother is really good with finding quotes so I asked her to help me. She found this one and I thought it was appropriate. When I put it up my 9 year old said, "Yep, Mom that is you. You have a lot of enthusiasm and you make great stuff." Got to love that kid!
Giving credit- this quote was said by Earl Nightingale.
Thanks for visiting!
Labels:
home decor,
lyrical letters,
quote,
vinyl,
wall
Sunday, February 13, 2011
Another name sign
There is someone on my shopping list that likes pink flamingos and golfing... how in the world can I tie that together I wondered? My husband thought the idea of a flamingo driving a golf cart was ridiculous... so of course I had to make the flamingo drive the golf cart. The person I was making this for has their "winter" home done in yellows, blues, and white so I wanted to bring in those colors. Here is what the final product is...
Sorry about my reflection in the way here! I also had to crop the heck out of it to hide the HUGE pile of laundry in the background... lots of laundry got washed this weekend while I crafted. Of course it is all in the chair now. I keep thinking MAYBE my husband will see that it is right next to him and fold it- hey a woman can dream right?!
This is not my favorite work I have done but it seems just right for the person I made it for, so I am going to go with it.
I used a regular frame that my hubby painted white for me. Then for Cricut cartridges I used Life's A Beach and Everyday Paper Dolls.
Sorry about my reflection in the way here! I also had to crop the heck out of it to hide the HUGE pile of laundry in the background... lots of laundry got washed this weekend while I crafted. Of course it is all in the chair now. I keep thinking MAYBE my husband will see that it is right next to him and fold it- hey a woman can dream right?!
This is not my favorite work I have done but it seems just right for the person I made it for, so I am going to go with it.
I used a regular frame that my hubby painted white for me. Then for Cricut cartridges I used Life's A Beach and Everyday Paper Dolls.
Labels:
everyday paper dolls,
gift,
golf,
home decor,
life's a beach,
name sign,
personalized
Saturday, January 29, 2011
Name Sign
For my aunt's birthday I wanted to try out something I haven't done before. She has a really cute house with lots of unique and tasteful things on the walls. So I wanted to give her something personal for the house.
First I got a frame:
The print on the scrapbook paper doesn't show up all that much in the pics. Sorry about that!
I used the Base Camp font cartridge for the lettering and made it the correct size by using my Gypsy. Then I cut the name out onto black card stock to see how it looked and to pick the background. The background is just a design piece of card stock. One thing that bothers me about this font when I look at the pics is the size of the "O"s... I find it odd that they are taller and this will make me crazy forever now!!!! Anyway, once I liked it all I cut it on vinyl and used transfer tape to adhere the letters to the outside of the glass. I find it important to mention here.... the transfer tape rocks my world! I WILL be using this from now on when doing a vinyl project.
First I got a frame:
The print on the scrapbook paper doesn't show up all that much in the pics. Sorry about that!
I used the Base Camp font cartridge for the lettering and made it the correct size by using my Gypsy. Then I cut the name out onto black card stock to see how it looked and to pick the background. The background is just a design piece of card stock. One thing that bothers me about this font when I look at the pics is the size of the "O"s... I find it odd that they are taller and this will make me crazy forever now!!!! Anyway, once I liked it all I cut it on vinyl and used transfer tape to adhere the letters to the outside of the glass. I find it important to mention here.... the transfer tape rocks my world! I WILL be using this from now on when doing a vinyl project.
Subscribe to:
Posts (Atom)